Early photography
1700 |
Realism
Artists began to become obsessed with the idea of trying to capture and represent the essence of reality. Leonardo Da Vinci was well known for his numerous anatomical drawings, especially when as there were advances in science |
1760-
|
The Industrial Revolution
As there were a lot of technological advances scientist tried to mass-produce reality in fixed formats, which we now call photographs. The scientist, Joseph Niepce, produced the very first projected image in southern France. He produced the image through the process of soaking paper in chemicals and then placing it on the window where the light that shone through created a tonal image |
1800 |
Camera Obscura
The development of the Camera Obscura overcame the problem of trying to provide the perfect perspective of scenery. the instrument worked by inverting an image then projecting it onto a surface. |

|
1807 |

Camera Lucida
After technological advances the Camera Lucida was smaller and more developed that the cmera obscura allowing it to be portable. The Camera Lucida uses a prism to allow an artist to draw an object or scene whilst looking at it simultaneously. This enables an artist to create a drawing with perspective |
1822 |
The Diorama
Together both Daguerre and Niepce the worked together to produce The Diorama, which was a popular form of entertainment in Paris in the 1820s. The Diorama provided the audience with a realistic theatrical experience. |
1835 - 1838 |
Photogenic Drawings
The first photogenic drawings came about due to initial experiments that were done by Talbot. Photogenic drawing are also be known as photograms. Photogenic drawings are produced by soaking paper in a solution. |
1839 |

Daguerreotype
The Daguerreotype process produced images on metallic surfaces through the use of chemicals. The process produced images on the chemical coated metal plates by having a positive image being created directly onto the plate. The Daguerreotype was used widely as it was adopted by Europe and America. |
1841 |

Calotype
William Henry Fox Talbot's Calotype had an advantage over it counterpart, the Daguerreotype. Unlike the Daguerreotype the Calotype had the option of being reproduced as a negative, thus allowing it to conform to the idea of the mass production of realism. In its earlier days the quality of the Calotype lacked sharpness and quality, however the quality of the Calotype improved due to advances in paper and chemical technology. The photography process is now commonly used today due to advances |
1865 |
Themes
Overtime many photographers began to separate themselves from traditional themes such as landscapes and portraiture as well as separate themselves from contemporary artists. |

|
Camera obscura
To create the camera obscura was simple. Only number of utensils were used: a cardboard box, tracing paper, masking tape, a lens and scissors.
The first step to creating a camera obscura is to construct the cardboard box, leaving one end open and ensure that all no light enters. Secondly, a small aperture was made in the centre of the closed end of the box using scissors. After that a lens was then secured over the aperture to focus the image further, making it clearer. Masking tape was then used again to secure the scree to the box.
When trying to capture images from the camera obsura it was key that the image was viewed for from a dark area. Taking pictures outside in the open had both its benefits and its disadvantages. The up side of using the camera obscura outside was that the natural light from the sun created a clearer and sharper image
Although the camera obscura does not produce the sharpest of images it is fascinating to see something you made with your own hands produce an image. The image created by the camera is then projected as an inverted image of the scene behind the lens on the screen (tracing paper). For the purpose of presenting the images the images captured were inverted for the purpose of viewing. When constructing the box the tracing paper was moved backwards and forwards to focus the image. The distance between the lens and the screen, where the image is completely in focus, is called the focal length. Moving the lens closer towards the lens caused the image on the screen to enlarge, whilst moving the tracing paper screen away from the lens caused the image projected on the screen to shrink. Increasing the aperture allowed more light to enter the lens.


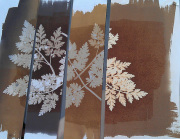
Photograms
A photogram uses photographic paper to create a silhouette image of the object places on top. The photographic sheets are covered in silver nitrate which is light sensitive, when exposed to white light (e.g. sunlight) it becomes black. Placing the objects in an arrangement on the paper causes the silhouettes of the arrangement be transferred onto the paper. The more opaque the object the whiter the silhouette of the object appears on the photographic paper.
In order to find the appropriate time to expose the photographic paper a test strip was used.
In order to find the appropriate time to expose the photographic paper a test strip was used.
- Adjust the aperture but changing the height of the enlarger and focus the lens.
- Ensure the safety light is on to allow for modelling by placing the red filter of the light.
- Place the test strip under the enlarger and adjust the objects on the photographic paper.
- Take a piece of black card and hold it over the photographic paper, with part of the photographic paper exposed to the light.
- Turn the enlarger, exposing the uncovered part of the enlarger on for one second. The time that the paper is exposed to depends on the light intensity. A stronger light intensity reduce the exposure time.
- Move the black card backwards, away from the section of the photographic paper that was exposed to light.
- Continue to the back card backwards at quarterly intervals until the black card reaches the end of the photographic paper.
- Transfer the test strip to the developer for 3 minutes, then the stop for 1 minute, next into the fixer and finally into a tray of running water.
- The test strip should should a in the tone of the paper. The time in which the photographic paper is the blackest is the appropriate exposure time for that aperture.

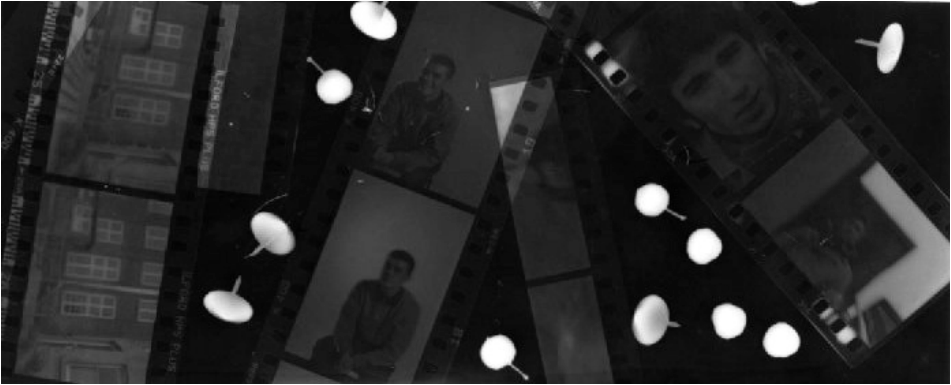
Once the photographic paper is exposed to white light from the enlarger the photography needs to be developed. Using the timer attached to the enlarger the photographic paper was exposed to to white light for 3 seconds. After that the objects were removed and the sheet was transferred to the developer for 2 minutes, then into the stop chemicals for 3 minutes to stop the photogram from developing any further. Subsequently, the photogram was then placed in the fixer. Then all the chemicals were washed off in water and the photogram was dried to produce the final product.
Th most interesting of the object on offer to use was the photo negatives. Using the negatives added a different dimension to the photograms as it added another dimension. This was also due to the fact that translucency varied which resulted in a variation of mid tones.
The entire process of creating the photogram was done inside a dark room.
The better photogram have the areas that were exposed to the white light completely appeared as black. In order to improve the quality of my photogram I would increase the time that the paper was exposed to the light. In addition I would ensure that when putting the photographic paper into the developer it is submerged completely. This is because not submerging the sheets completely resulted in particular part of the image developing faster than the other.
|
|


PHOTOGRAM PHOTOGRAPHER: KUNIE SUGIURAU
Kunié Sugiura is a modern photographer who's chosen medium is the photogram. Sugiura's photographs have a very naturalistic theme and feature a lot of ... such as leaves and plants, The composition of Suguira's photograms often involve overlapping amongst the objects which adds an interesting element to photograms. My favourite piece from Suguira is a photogram where the flowers almost form a spiral. The concentration of flowers decreases in a spiral motion as you move away from the centre. The added technique of solarisation adds depth to the image, thus making the roses look three dimensional.


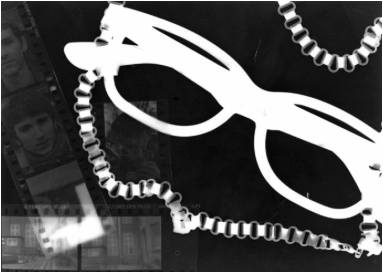
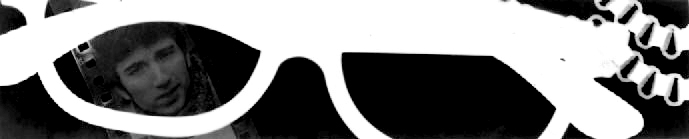
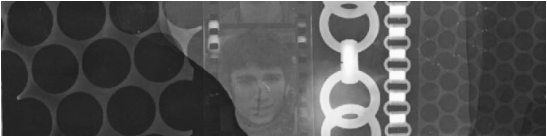
Photograms Portraits
|
The photogram portraits I created were inspired by the work of Jocelyn Carlin. Her photograms produces interesting and beautiful portraits thought the use of pairing silhouette with a variety of objects ranging in densities. The contrasting translucencies of the objects that create the silhouettes add an extra depth to the photographic prints. Carlin's use of silhouettes that are reminiscent of those of the 18th century as well as the use of beautiful textures and layers allows an audience to read into what is presented to them.
To create the silhouettes that were used to create the portrait photograms a profile shot was taken. The profile shot was then printed out and backed onto black card. Using scissors and a scalpel the profile shot was cut out of the card producing sharp and smooth edges, whilst taking into account all of the details. The processes of producing a silhouette results in the creation of two cut outs. |
|


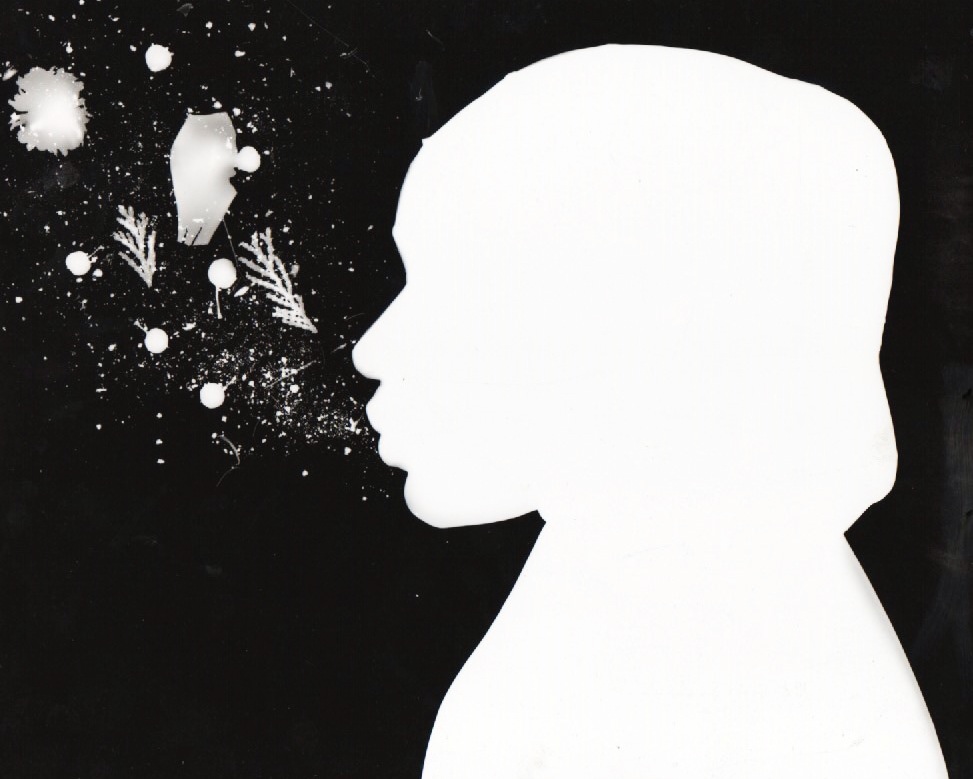
The first photogram portrait has a white silhouette on the left hand side of the photogram. The photogram also shows a trail of what almost looks to be stars - as the white specks stand out against the black background - whilst there is an arrangement of the outlines of leaves and a flower. The natural element of the photogram gives it an almost ethereal and whimsical theme.
The second of the photograms continues with the natural theme of the first photogram. However unlike the first photogram the second photogram features two of the same silhouette. The focal point of the silhouette that appears in black whilst the whist the white silhouette remains in the background. The main, black silhouette, is speckled with images of leaves and petals. The tones of the petals add a complementary delicate touch to the photogram. The gradient of the scattering of leaves closer to the lips and the nose than the back of the head gives an emphasis on the features of the profile.
|

|
Reading photographs
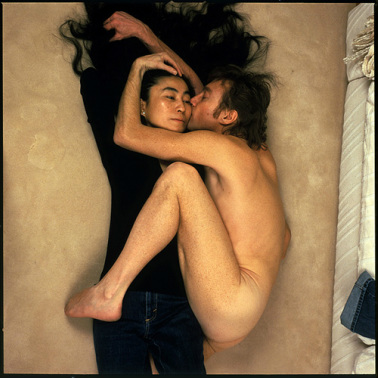
John Lennon and Yoko Ono - Annie Leibovitz
|
Impression at the start of the lesson
In the image of Yoko Ono and John Lennon may be interpreted to symbolise the close relationship between the couple. Lennon's foetal position that around curls round his wife suggests he is dependant on her, whilst she nurtures him. The bareness of Lennon's body could perhaps illustrate his vulnerability. Impression at the end of the lesson The famous photograph taken of Yoko Ono and John Jennon, taken by Annie Leibovitz is iconic as it was taken just a few hours before Lennon's assassination. The image, taken for The Rolling Stone magazine, is part of history as it captured one of the last few moments before Lennon's death. |
 John Lennon and Paul McCartney - David Bailey
Impression at the start of the lesson
The photograph is a portrait of two of the most famous Beatles, John Lennon and Paul McCartney. The image image looks like it displays the close relationship and brotherhood between the two subjects.
Impression at the end of the lesson
David Bailey's innovative use of a white background when shooting his portraits resulted in the audiences focus on the people in the picture rather than their surroundings. The positions of the models seem to be forced and unnatural. This is ironic as Lennon and McCartney's relationship behind closed doors was reportedly strained, the image taken perhaps masks
Impression at the start of the lesson
The image shows a mother changing the nappy of her child in a not so hygienic surrounding. The environment in which the subject of the photograph sits in almost resembles the scene of a natural disaster, with litter lining the side of the pavement. From looking at the photograph only the themes of devastation and desperation are present.
Impression at the end of the lesson
The photograph is from a series by the photographer Martin Parr. The collection of photographs were taken in 1985 in the new Brighton sea resort. The image displayed conveys the suffering that families endured as well as their use of holidays to places such as ... to allow them to indulge in some escapism. The bright colours makes the image seem almost upsetting.
|
Impression at the start of the lesson
Upon my first look of the image I thought the separate windows in the building represented the independent lives people in a community live. The random distribution of lights in the windows could signify the vibrant lives each individual lives as well as secrets hidden inside the room. Impression at the end of the lesson After the bombing of the world world many Britons were left homeless and the government therefore creating the needed for houses in the form of tower blocks. The construction of the 'communities in the sky' had an adverse effect. Many residents who felt like they were trapped and forced to live in the tower block. In order, to be relocated some of the residents tried set alight there flats. Seaborne's use of the light in the widows of the flats represents the sheer number of people that want to escape from the confines of their home, hence the title 'Tower Inferno'. The image was taken of Turnpike House in Finsbury, Islington. |

Tower Inferno - Mike Seaborne
|
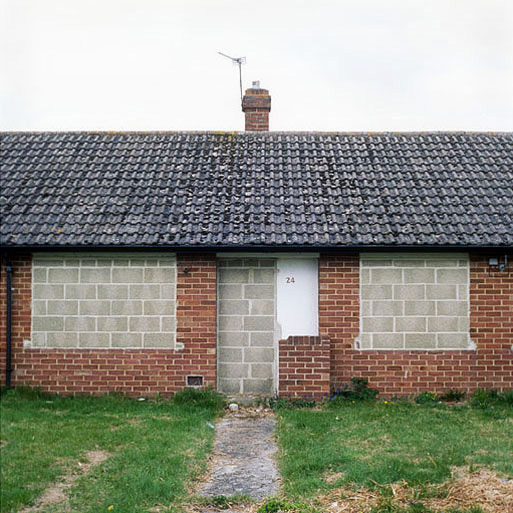
Downturn - James Duncan Clark
|
Impression at the start of the lesson
The composition of the image is very symmetrical. The photographer's use of symmetry creates a profound impact on an audience. Their technique suggests that there has recently been an event that caused a large impact the area, that is perhaps the UK. In addition, the green of the grass and the red of the bricks contrast with the blank white sky. This contrast add to the dull and lifeless atmosphere the photographer creates through his lens. Impression at the end of the lesson The photograph is from James Duncan Clark's photographic documentary 'Downturn'. The purpose of the documentary was to capture the effects that the economic turmoil had on the landscape of Britain. In the series of images Clark photographed scenes of street corners, a cafe and pubs, all of which were vacant of people. As a result of the recession many people retreated back into their homes, leaving the city landscapes empty. |
Rule of thirds
|
The rule of is used in photography to enhance the composition of photographs. The rule consists of splitting the frame horizontally and vertically into three equal segment. The main point of focus is then placed near or on an intersecting point to dramatically improves the composition of the images. The rule of thirds acts as guideline for improving the composition of images. The examples show how when a subject if placed on an intersection point it makes the image more aesthetically pleasing as it balances the photograph, making it more coherent.
|
|


Solarised Photogram The Last Resort - Martin Parr The Last Resort - Martin Parr
A solarisation creates a photogram where the silhouette has edges that appear to almost be glowing.
To create a solarised photogram the first normal few step to create a photogram are done. Objects are placed under the enlarger on op of the photographic paper and exposed to the light. When developing the photogram the photographic paper is submerged in the developer for a few seconds, just enough time to allow the image to develop slightly. /once the image is developed slightly the photographic sheet is then exposed to light once again and submerged in the developer once again for 3 minutes. After that it is then placed into to stop for 1 minutes, then the fix and rinsed under running water. |

|
SANDWICh Printing
|
The process of sandwiching in terms of photograms is a process that use a photogram to produce another photogram with inverted tones.
Firstly a photogram is produced in a dark room. A sheet of photographic paper is placed under the enlarger with the photogram places over the top. The photogram should cover the majority of the photographic paper beneath to make sure the silhouette is transferred. A piece of glass is placed over the two sheets, sandwiching them together. The exposure time is increased in comparison to the exposure time used to create the original photogram. This is due to the fact that the light needs more time to penetrate the white spaces on the photographic paper above. The photographic paper is then developed - using the developer, stop and fixer chemicals. The end product of the process is a negative of the original photogram used. |

|


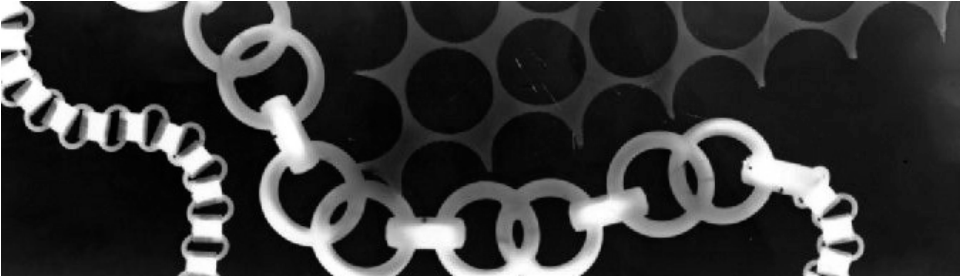
Moving objectsA photogram with moving images creates duplicate silhouettes of the object that is moved on the photogram.
Produce a moving object silhouette the optimum exposure time for the settings of the enlarger. The necessary exposure time is then divided into equal parts. In the case of the example photogram on the left, the exposure time was 2 on the enlarger timer. The 2 was then divided into 4 to give a result of 0.5. This meant that after every 0.5 on the timer the object was moved four times under the enlarger. The object was moved once the light was off, so that the photographer's hands did not interfere with the image produced by the photogram. The best moving object photograms are produced when the silhouettes of the object overlap each other. |
|
Family photo comparison


Although both of the image were taken in different countries, in different times and in different circumstances the position of the models are staged. In the older photograph the oldest family members are situated at the back with the younger ones at the front. At the centre of the photograph is the celebrate, who's birthday it is. Another figure that also stands out is the head of the family, the grandmother. Generally at the time it was unusual to have a woman as the head of the family, but in this case it is necessary as the family lack an older male figures. Overall the image is dominated by females.
Like the older photograph the image focuses on celebrant, who in this case is graduating. The image is also a reflection of the times we live in as it displays female empowerment. In the UK women are given the equal opportunity to get a further education, receiving their degrees and masters.
The traditional clothes shown in the photograph are all in the same material. It is part of Nigerian culture for families to wear the same material as it unities them and also allows outsiders to see that the family are one. Whilst the fabric shows that the family are one the various styles the material is sewn into along with the accessories illustrates each person's individuality.
The older photograph was taken on a street in Nigeria whereas the modern image was taken in the Barbican Centre, London. The fact that the older photograph was taken on a street shows the community spirit that ran through the streets at the time. It was normal for people to have street parties at the time, a person’s neighbours were considered to be part of their extended family. On the other hand, the other picture was taken in the heart of the capital.
Even though the both images was taken at night the is a clear contrast in the lighting and the quality of the images. As a result of being in a developing country where electricity is not widely accessible the lighting in the photograph is very bad. In comparison, the more recently photograph image has lighting the surrounding and the camera. Overall the quality of the recent image is much better than that of the older photograph. The second image was taken on a 18 mega-pixel digital camera, thus allowing for a realistic image, where the colours are more representative of the actual situation. The higher resolution of the image as a result of technical advances allows an audience to see the fine details. Whilst the older photograph was taken with a film camera. The sepia tone of the image clearly shows that the photograph is tarnished with signs of age.
- Gender roles – At the time men were considered to be heads of the family. However, unfortunately as a result of the death of the head of the family the responsibly falls to his wife. As a result of having a large family many of the children were sent away to the outskirts of the city to be brought up and educated. Celebration such as birthdays, like the one encapsulated in the photograph, were good places for everyone to catch up with each other.
Pinhole camera
The process in which the pinhole camera uses to produce the negative photograph on the photo graphic paper was very similar to the process of the camera obscura.
To create the pinhole camera a hole was made in the middle of the curved side of the Pringles can, creating a flap. Tape was then placed over the flap to allow for the hole to be resealable. The hole was then covered in the inside of the can then another small hole was created with a pin. The lid of the empty Pringles can was then covered with tape in order to stop any light from entering the can.
Upon the first attempt of trying to produce a photograph from the pinhole camera an exposure time of 4 seconds was used. The exposure time of 4 seconds was too little as the dark tones, produced by exposure to light, were not dark enough. As a result of this the exposure time on the second photograph I produced with the pinhole camera was increased to 11 seconds.
Light from the scene opposite entered through the pinhole in the Pringles. The light rays was then refracted and projected onto the photographic paper place opposite the pinhole inside the pinhole camera. The photographic paper was the developed in the dark room to produce a negative photograph of the scene capture, dark tones were captured in white and light tones were captured on the photographic paper.
A sandwich print was then taken of the original negative photograph produced by the pinhole camera. The sandwich printing process inverts the tones of the photograph. A sheet of glass was on top of a sheet of photographic paper with the negative photograph placed faced down on top of it. A test strip was then created in order to determine the exposure time to be used.


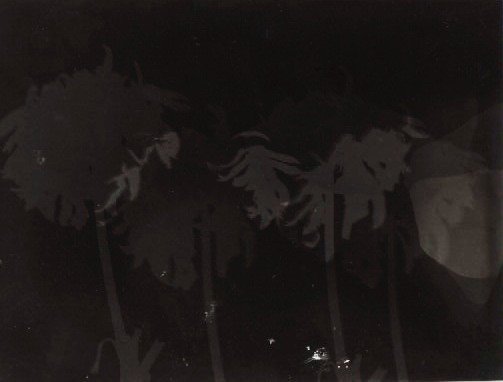
PINHOLE PHOTOGRAPHERS: STEVE IRVINE
Irvine's pinhole photographs are a low tech and created through the use of homemade pinhole camera. The process is also luke trial and error as Irvine only sees tye outcome once the image is devloped. The long exposure times show movement in the images, such as leaves flowing in the wind. In his images Irvine explores structures and symmetry.


Film camera basics
Aperture
The aperture is a hole in the camera that determines the quantity of light that is let into the camera. The aperture is made up of a series of metal blades, the diaphragm, this can be adjusted to change the size of the aperture. The size of the aperture is measured in f stops (f/number). The smaller the number the larger the hole and the larger the number the smaller the hole. The aperture can be controlled on a camera by turning the lens.
The aperture is a hole in the camera that determines the quantity of light that is let into the camera. The aperture is made up of a series of metal blades, the diaphragm, this can be adjusted to change the size of the aperture. The size of the aperture is measured in f stops (f/number). The smaller the number the larger the hole and the larger the number the smaller the hole. The aperture can be controlled on a camera by turning the lens.
Shutter speed
The shutter speed is the time period in which the camera's shutter stays open to allow light to enter through the lens and burn the film. The shutter speed is measured in seconds or fractions of a second, it can be controlled using a dial that is generally located at the top of the camera next to the shutter release button.
The shutter speed is the time period in which the camera's shutter stays open to allow light to enter through the lens and burn the film. The shutter speed is measured in seconds or fractions of a second, it can be controlled using a dial that is generally located at the top of the camera next to the shutter release button.
Film speed
Film speeds are measured in ISO numbers and range from 25-1000. The lower the number the slower the film and therefore the more light (longer exposure time) needed to produce a good photograph. Majority of the film used by photographers ranges between ISO 50-400. Film that is ISO 25-100 are generally slow film, with low light sensitivity, and therefore produce excellent quality and fine grained photographs. However, a downside is that when using a with low light sensitivity requires the use of a strong light source. Medium film, with mid sensitivity, commonly have an ISO of 200-400 and overall are good quality. Although film can be slow in low light. Additionally, film with an ISO of 800-1600+ is fast and has a high sensitivity. An advantage of using fast film is that it is good in low light or dark setting, without the use of flash. On the other hand, a disadvantage of using fast film is that photographs produced can be grainy.
Developing film
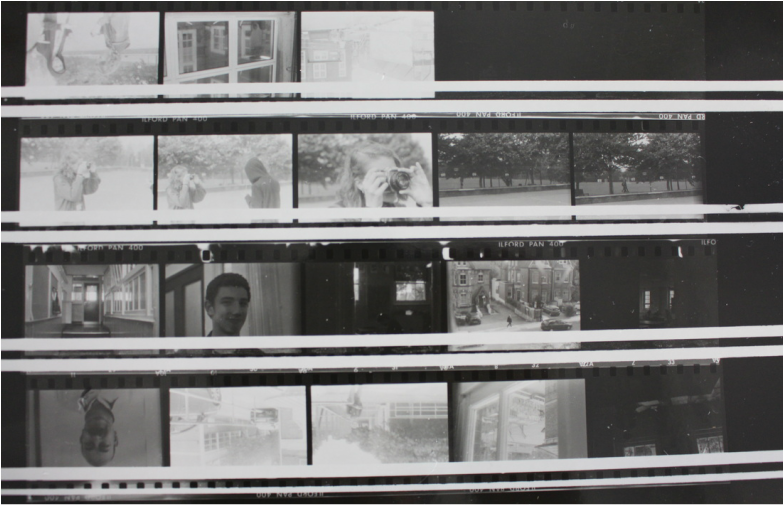
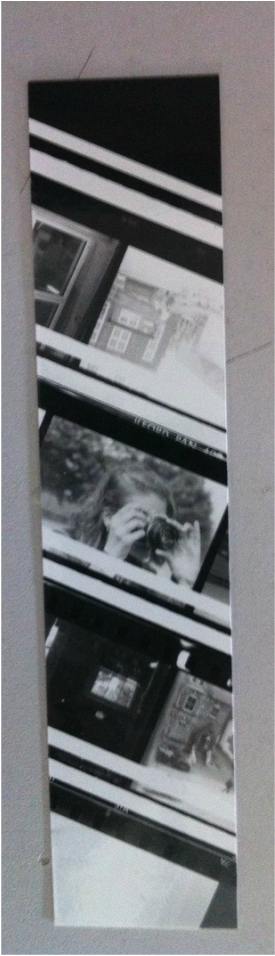
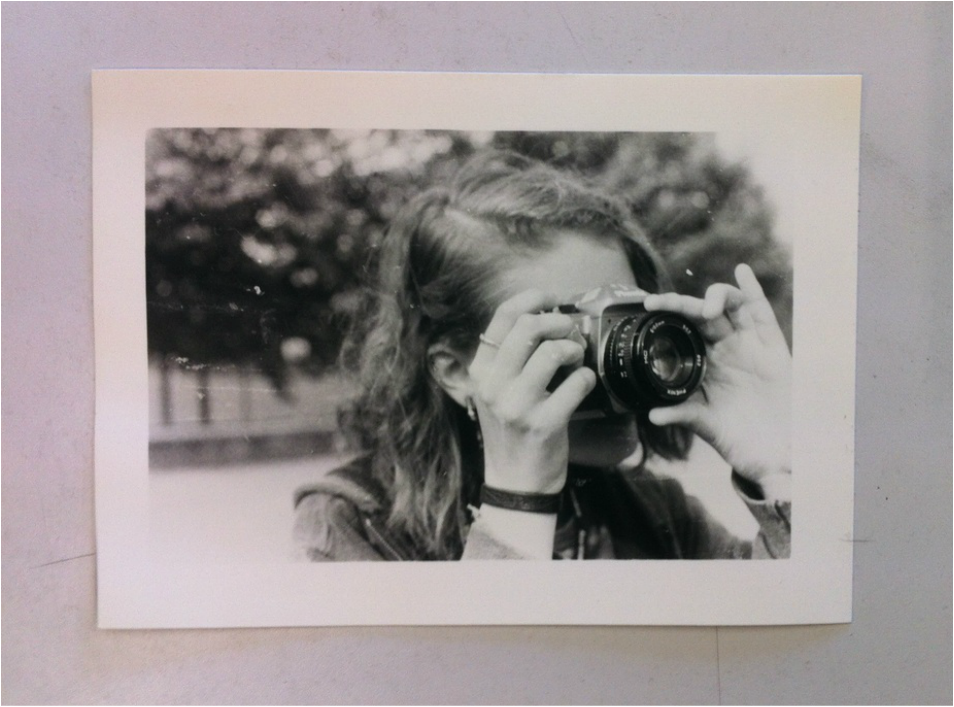
The film speed that I used on this series of photographs was ISO 400. The film negatives were cut into 4 strips with 5 frames in each strip. The film strips were then slotted into the glass of the contact printer to secure them. Under the safety light of the dark room the photographic paper was placed under glass of the contact printer. The contact printer was then placed under an enlarger. A test strip was then made to determine the exposure time for the contact sheet.
The contact sheet was then used to create a larger print of one the images on the contact sheet. The chosen negative was then placed upside down in the holder of the top of the enlarger. The emulsion side was placed upwards. Using a focus finder the enlarger was adjusted so that crystals in a grainy pattern could be seen, making the image be in focus. To focus the image the focus finder was placed in the centre, directly under the enlarger. A test strip of the image that was to be enlarged was then made to find the correct exposure time. The enlarger was then set to an exposure time of 20 seconds to produce a print. The print was then developed in the developer, then in the stop and fixer. After that the print was then rinsed under running water and dried in a heater.
Film speeds are measured in ISO numbers and range from 25-1000. The lower the number the slower the film and therefore the more light (longer exposure time) needed to produce a good photograph. Majority of the film used by photographers ranges between ISO 50-400. Film that is ISO 25-100 are generally slow film, with low light sensitivity, and therefore produce excellent quality and fine grained photographs. However, a downside is that when using a with low light sensitivity requires the use of a strong light source. Medium film, with mid sensitivity, commonly have an ISO of 200-400 and overall are good quality. Although film can be slow in low light. Additionally, film with an ISO of 800-1600+ is fast and has a high sensitivity. An advantage of using fast film is that it is good in low light or dark setting, without the use of flash. On the other hand, a disadvantage of using fast film is that photographs produced can be grainy.
Developing film
The film speed that I used on this series of photographs was ISO 400. The film negatives were cut into 4 strips with 5 frames in each strip. The film strips were then slotted into the glass of the contact printer to secure them. Under the safety light of the dark room the photographic paper was placed under glass of the contact printer. The contact printer was then placed under an enlarger. A test strip was then made to determine the exposure time for the contact sheet.
The contact sheet was then used to create a larger print of one the images on the contact sheet. The chosen negative was then placed upside down in the holder of the top of the enlarger. The emulsion side was placed upwards. Using a focus finder the enlarger was adjusted so that crystals in a grainy pattern could be seen, making the image be in focus. To focus the image the focus finder was placed in the centre, directly under the enlarger. A test strip of the image that was to be enlarged was then made to find the correct exposure time. The enlarger was then set to an exposure time of 20 seconds to produce a print. The print was then developed in the developer, then in the stop and fixer. After that the print was then rinsed under running water and dried in a heater.
|
|
Shutter speed and aperture
Change in aperture
The aperture setting used when taking a photograph has an effect of amount of focal range in focus both in front of and behind the subject.
Two people were photographed standing in a line with a distance of about one metre between them. The camera was then focused on the person in at the front. Take three pictures using the following aperture setting: f/3.5, f/4 and f/4.5. As the aperture decreased the depth of field was increased. Comparing the image with the


Shutter Speed Priority
A moving subject was captured against a simple still background to test out the effect of a change in shutter speed. To focus oh the affect of changing the shutter speed alone the Aperture fixed at f/8. The angle the shot was taken as well as the poses were also tried to be kept the same in order to make the impact of change in shutter speed more noticeable. Three images were then taken of the same moving scene with a simple background.
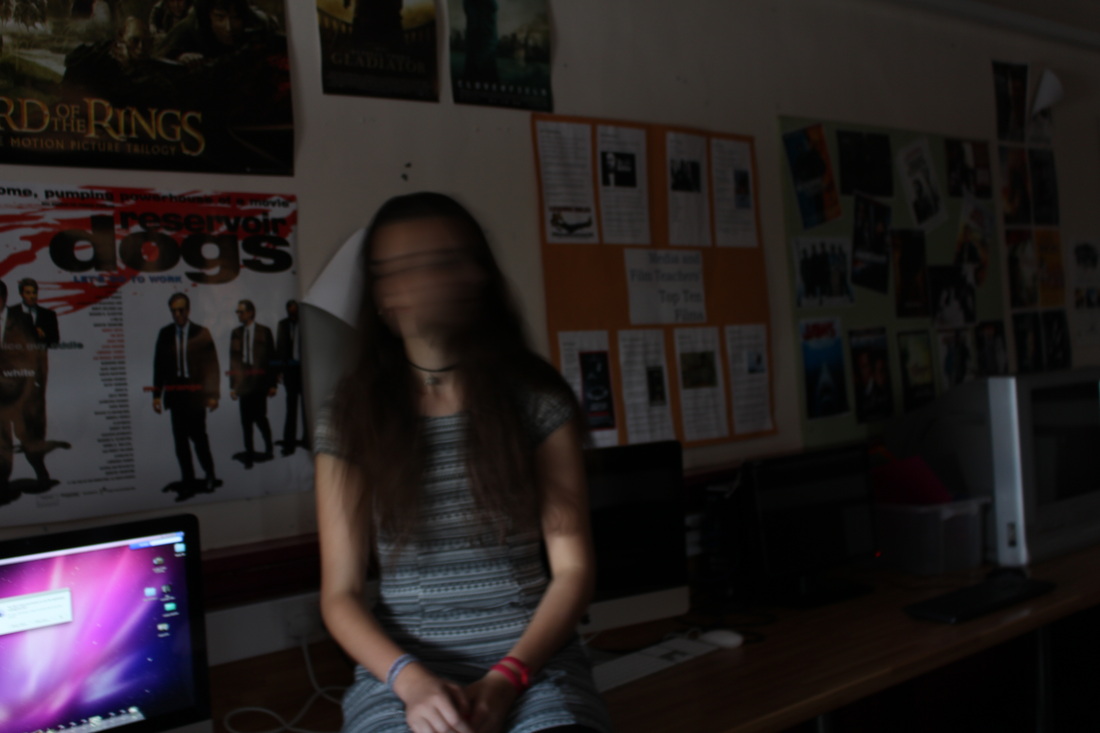
The faster shutter speeds captured the motion of the subject clearly. For example in the image of the blue ink hitting the water a shutter speed of 1/800 second was used. This fast shutter speed enabled the camera to photograph the splash back of the water creating clear and crisp lines. In comparison the images that were taken with the camera set to a slow shutter speed produce images with blurred lines, the image was also out of focus. In the image that used a shutter speed of 1/4 seconds the product was an image were the subject's face was blurred by the fast movement of her head whilst the background remained clear and in focus.
Overall the faster the shutter speed the more in focus a moving image will be. In comparison the slower shutter speeds produce images with still in focused backgroundas
A moving subject was captured against a simple still background to test out the effect of a change in shutter speed. To focus oh the affect of changing the shutter speed alone the Aperture fixed at f/8. The angle the shot was taken as well as the poses were also tried to be kept the same in order to make the impact of change in shutter speed more noticeable. Three images were then taken of the same moving scene with a simple background.
The faster shutter speeds captured the motion of the subject clearly. For example in the image of the blue ink hitting the water a shutter speed of 1/800 second was used. This fast shutter speed enabled the camera to photograph the splash back of the water creating clear and crisp lines. In comparison the images that were taken with the camera set to a slow shutter speed produce images with blurred lines, the image was also out of focus. In the image that used a shutter speed of 1/4 seconds the product was an image were the subject's face was blurred by the fast movement of her head whilst the background remained clear and in focus.
Overall the faster the shutter speed the more in focus a moving image will be. In comparison the slower shutter speeds produce images with still in focused backgroundas


1/4 f/4 27mm
Fast Shutter Speed: PHILIPPE HALSMAN
Philippe Halsman used fast shutter speeds to capture still images of people jumping. The pictures from Halsman's Jump series were comprised in a book called “Philippe Halsman’s Jump Book” (1959).
Whilst on sets photographing some of his famous sitter Halsman also requested that each of them would jump for him. The freedom in the motion of jumping takes the edge of the awkwardness that generally comes with a formal sitting. The movement of jumping makes the models uncontrolled in the moment captured in the image.
From the collection my favourite piece is the photograph of Eva Maria Saint in 1954. The photograph also make it seem that the actress is floating above the city gracefully. The gracefulness of her jump suggest that even when doing something that should render us to be without control Eva Maria Saint is still able to look beautiful.
Another of my favourite images from the collection is the photograph of Audrey Hepburn. The image of her jumping in what looks to be an enchanted garden presents her as being whimsical and child like. This allows an audience to see another side to her personality and instantly makes the image less formal.


